Thursday, July 12, 2012

Seashore

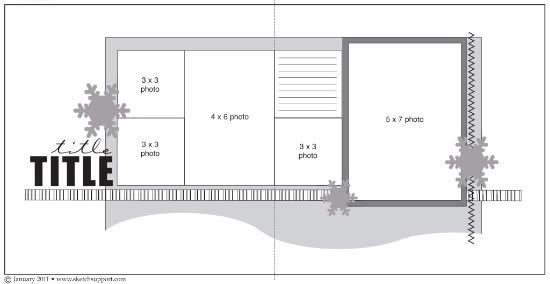
This is another layout that I'd done while we were in Jamaica but hadn't done the journalling.  I scraplifted this from Noel Culbertson's "Lemonade" layout in CK's Tips & Tricks 2010 magazine.


The sand dollars, title and marine animals are all from the Life's a Beach cart.  I added some gems as an accent.


To make this border, I layered some very old CM stickers on some ric rac.  I stuck them onto cardstock, fussy cut them and then mounted them on some foam tape.


I outlined the title with a glittery gel pen to make it stand out more as well as mounting it on foam tape.


Putting together these little die cuts was very piddly but I do love the look of them on the layout.


Wednesday, July 11, 2012

Zoo

This was a layout I started when we were still in Jamaica.  I'd finished everything except for the journalling.  So, I decided to get that done!  I wanted to highlight a tradition that we started for Mother's Day.

I know I used a sketch for this but I honestly can't remember where I got it from - it was so long ago!  So, I apologize for not giving credit to that person.  The paper is from a DCWV stack and the die cuts are from the Create-a-Critter cart.


Tuesday, July 10, 2012

Happy

Ever since he was young, A has loved to play in the water and in the dirt.  I love these pictures of him sitting at the kitchen sink with the water running over his hands.  You can tell he's just so pleased with himself.

I started this layout over a year ago, when we were still in Jamaica.  I wanted to play with paint a bit so I tried making bubble-looking circles using a lid dipped in paint and "stamping" it on to the background paper.  When I looked back on the page, I just didn't like it.  At all.  So, I did what a rarely do and I pulled it apart.  Actually, I kept the three vertical photos and changed the rest.  I decided to mist the background instead to give a bit of a "spray" feel.  I cut circles out of the water paper and then mounted them on green circles to do a bit of a border along the main photo.


I punched the water paper with my circle punch to replicate bubbles and then I filled in a few holes with a sparkly sticker.


I have white foam Thickers so I decided to paint them with some sparkly blue paint.  It took three coats of paint but I finally got the look I was wanting.


Monday, July 9, 2012

Giggles

Last Saturday, I did two layouts and this is the second of the two.  I love these pictures of A when he was just starting to laugh.  I decided to use this paper from "Baby Mine" by Fancy Pants Designs.  I'm not into the retro style but I couldn't resist this cute paper and the fabulous colours.


Hand stitching seems to be my favourite "technique" to use on my scrapbook pages.  I always tend to go to stitching for my pages.  I used the alpha stencils and the circle stencil I got from Bazzill to do both of my stitching.  I decided to add a few gems and sparkly brads to finish it off.


Friday, July 6, 2012

Happy Halloween

For last week's issue challenge, Erika asked us to use cupcake liners on our layout.  I checked out what I had in my cupcake supplies and it wasn't much.  But, I did have these Halloween ones so I decided to use them.  I had already done a LO for A's first Halloween but I did find some pics that hadn't been scrapped so I used those ones.

I wasn't too sure about using orange as the background on this page but decided to give it a try.  I figured I'd use enough green and a bit of black to balance it out.  The pumpkin was from the middle of the cupcake liner so I decided to use it as an embellie.  I pulled out the Lime Green stickles to add a little shine to the edge.  I cut the title out with my Cricut and I stitched the border with a Sew Easy head.  I absolutely love hand stitching on my layouts.


Here's a close-up of the cupcake liner embellie:


And I used up some ribbon and a 3-D sticker I got in a RAK from a friend.


Thursday, July 5, 2012

My New Scrapping Space

Now that I am on summer vacation, I decided to finish putting together my scrapping space.  I had cabinetry made for this space in the winter but I hadn't used it for scrapping.  I knew I had to take the time to put everything where I want it so that I can find everything easily and maximize my scrappy time.  I absolutely love it and can't wait to scrap the summer away.  :D

Because of the size of my space and the fact that it's a shared space with the kiddos' play area, I decided to go with a U-shaped desk.  Most of it is for me to use but the left surface is for the kids to scrap or do crafts at.  There's a space for a chair on one side and then further down space for a chair on the opposite side so they will be facing each other while crafting.


This is my drawer system.  I got six shallow but wide drawers made for housing my most-used supplies.  I've got my ATG and other adhesives as well as my pencils, erasers and ruler there.  In the second drawer, I have all my stitching tools - piercing mat, needles, stencils, Sew Easy and heads.  I have all my punches in the next drawer down.  In the fourth drawer, I have my inks and right below that, I have all my stamping stuff.  In the bottom drawer, that's where I keep my cutting supplies - my circle cutter and my Cricut gear.

Then I had him make 10 almost square drawers and that's where I keep my embellies.  I've got my gems and pearls in one drawer, chipboard in another, 3-dimensional stickers in another, mists, paints, Stickles, rub-ons, tags and extra adhesive.  None of them are full yet but I like having everything separate - it makes it so easy to find.


This is where I keep my paper.  Now, it's not a finished area because I need some more Cropper Hopper vertical storage containers to move my PP over.  Right now it's in a plastic bin with a lid under the desk and it works quite well.  I separate out my cardstock by colour (I do that with PP too) and store it here.  I keep my specialty papers in those coloured craft envelopes.  To the left of those, I have my magazines and my sketch book, my alphas and in the skinny one, I decided to put my Allison Davis sketch books.  On the bottom, I put the paper pads that I haven't taken apart because they're more specialty ones and some paper collections.  I also keep my folders where I put my page kits to work on down here.  And in the last square, I have all the baby boy stuff handy, since I'm still working on A's baby album.  :)


This is my shelf above the desk.  This is where I keep the bigger things and the prettier things that I use.  


Here's a close-ups of my ribbon, buttons and brad storage.  I bought these little glass jars in the winter and decided to separate all my goodies by colour.  I don't have that many brads so I put all the minis in one container and the bigger ones in another.  


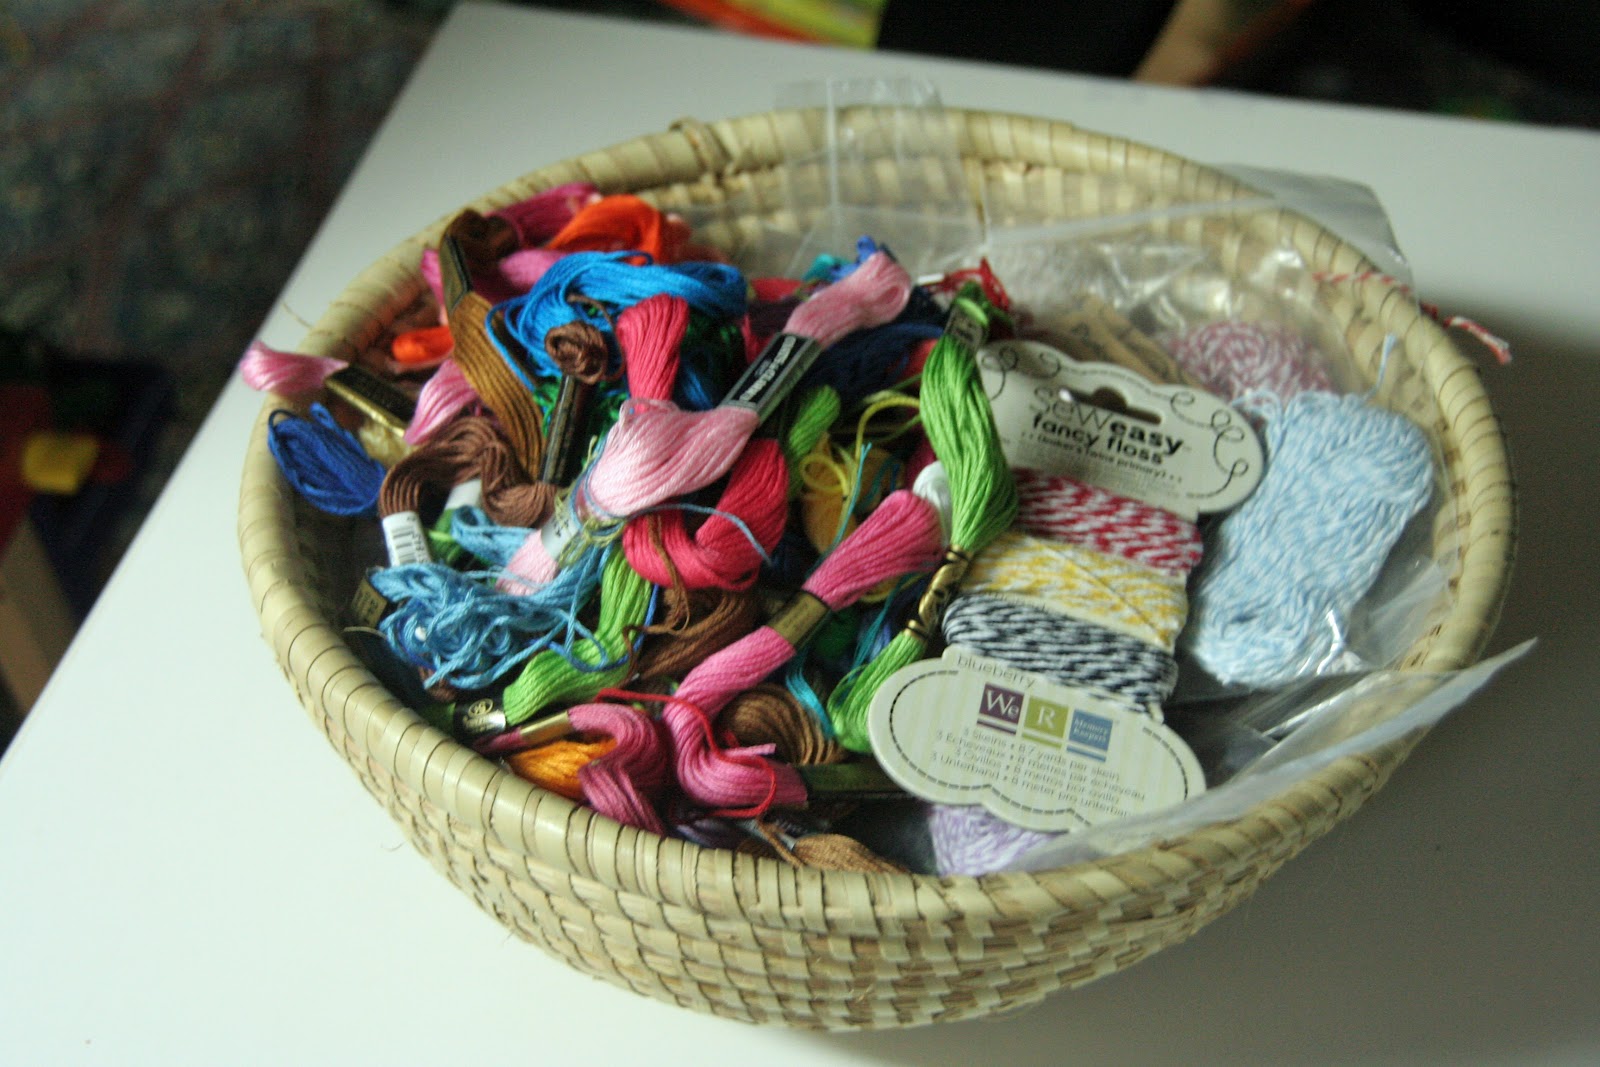
I decided to store all my embroidery floss and twine in this bowl that we got from Pakistan.  It doesn't take me long to find the colour I want in here and I like how it looks on the shelf.  :)


This is the spot where the kids can work.  I bought a big quilting mat from the fabric store when they had a 50% off sale.  So they can get messy all they want!  There's also one of the Ott lights I got from Joanne's online when they had one of their great sales.


This is my main area.  I decided to keep my craft mats out and ready.  I put my Cricut in the corner because I don't use it too often but I also don't want to have to lug it out when I do want to use it.  I love my other Ott light with a carousel for goodies.  I have a tray for my good pens and then just a regular pen stand for my not-so-special ones.


This is my big shelf.  I store my filled and unfilled albums there as well as page protectors and photos.  It's not organized much yet but at least I have a place for everything.  I got that Cropper Hopper cart at Christmas  and I decided to keep my less-used stuff there - stickers, bigger chipboard, etc.


I hope you enjoyed this little tour through my craft space.  Now I have to focus on decorating the walls around it with inspiration.

Monday, June 18, 2012

And That Someone Is You

My sister got married on Saturday and it was great!  I decided to do a scrapbook page for her and her hubby as part of our gift to them.  I made this page way back in February but I couldn't post it until now!

A little background to the title and lyrics...their favourite band is Nickelback.  I think my sister has been to five of their concerts!  So, when I decided to do a page for them, I wanted to use lyrics from one of their songs.  I chose "Gotta Be Somebody" because I think the chorus suits them so well.  I chose these colours because their wedding colours were eggplant and turquoise (I know, the blue is a little off but this was my closest kit!).

Digi Supplies:  "Goodnight Mr. Moon" by Kristin Cronin-Barrow
felt hearts by Patty Knox
purple paper by Libby Pritchett
straight stitch brush by Jessica Sprague


Tuesday, April 17, 2012

Earth Day 2012

At school, my community service group is organizing a lunch time activity in honour of Earth Day.  We're doing it a day late since Earth Day falls on a Sunday this year.  Here's the poster I made for the activity:

Digi Supplies:  Collaboration Kit "Love, Laughter & Sunshine" from Sweet Shoppe Designs

I love being able to use my scrapping knowledge for things other than scrapping!

Wednesday, April 11, 2012

Explore

This is another layout from our road trip.  These pictures were taken on the island of Chiloe, where we stayed for three days.  This is the little bay where we saw two species of penguins and other marine life - too fun!

My layout is based off this sketch at Sketch Support (Two-Page #7):


This is what I came up with:

Digital supplies:  Kona Coast - Julie Billingsley

I made that ripple myself in PSE so it's not perfect but I'm quite impressed that I managed to do it (and I honestly can't remember how I did it *blush*).  This is one of those templates I did a long time ago and am just now finishing the layout up.

I decided to use a beach kit that is more for swimming, lay-on-the-beach kind of photos because I love the colours.  I figured with K's colourful sweater and A's red jacket, I could get away with it.  ;)   I really like all the little elements that are with this kit but I love how the little sand splash behind the star fish turned out.  My favourite, though, is that beaded border that I put along the bottom of the photos - isn't it pretty?

Monday, April 9, 2012

From Here to There

We have Easter holidays right now and I've been fairly productive in the getting the house sorted side of things so I decided to tackle another project of mine, which is our road trip from 2010.  I started this album long ago and I put it to the side because I was tired of doing trip pages.  I tend to get this way - I can't do much of one thing or I lose inspiration.

However, I did do something quite brilliant before leaving Jamaica, and that was to get the bones of these pages done.  I separated my photos into regions and then into activities so I knew which photos I wanted to go together.  Then I made up templates and added the photos into them.  So, the photo placement and any blocking was done.  What was left?  Choosing the papers and embellies, finding a title and writing the journalling.

This page was one of the ones I'd gotten ready.  I haven't been in the mood to design anything lately - I'm just too tired to be creative and have to think about it - so I thought I'd try this one-pager, very clean layout.  I really enjoyed doing it - finding the right papers and embellies is fun so it was the perfect thing for me.

Digital supplies:  Strawberry Fields - Misty Cato

I wouldn't want to do all my pages this way but I have to say that from time to time, it's nice to have the option of doing it.  I think I may add this to my arsenal of scrapping techniques, especially when you've got a ton of pictures that you want to scrap in a certain order!

Monday, April 2, 2012

Birthday Fun

Wow, have I been a stranger around here!!  I haven't done any scrapping in over a month and it's making me really sad.  I'll take care of that over the Easter break!  Life has been so busy with marking, report cards and day-to-day life that sadly, my hobbies have taken a backseat.

K is turning six this week - I can hardly believe it!  But our little girl is growing up into a beautiful big girl and we're very proud of her.  We had her birthday party this past weekend and I did use my digi scrapping supplies for K's birthday invitation.  She wanted a Hello Kitty cake so I thought I'd make her an invite too.  I'm really happy with how it turned out.

Supplies used:  "Storybook Princess" by Julie Billingsley, Hello Kitty images found through a Google search

We went bowling first and then came home to continue the fun.  It was great!  The kids and adults all had fun.  :)  Here are some pics from the day:


Friday, March 2, 2012

New Scrappy Space

I am absolutely beyond excited...the furniture for my new scrappy space is installed!!!  This is a dream come true and I'm so happy that I'll finally have a space for my stuff.  Derwin is the best - he knows how I'd love to have a space just for scrapbooking and he knows how much this hobby means to me.  So, he told me to decide what I wanted to have in the scrappy space and get it made.  Aren't I married to the best guy ever?!?!

Making the decision was really hard.  I really wanted a big island-style table in the middle of the room to work at where I could stand or have a tall stool.  However, with the space that we have and how we share it with play space, I felt it wasn't the best fit.  I looked through all kinds of pictures to find what I wanted and then had my ideas ready.

This is the desk and shelf that I had made.  I wanted a U-shaped desk so I could be working on one side while the kids did their crafts next to me.  If they need help, they're right there so I don't have to get up and go to them.  I got the shelf made for above for all those embellies that fit into those pretty jars.  :D


This is the set of drawers I had him make for all my itty bitty stuff - bottles of paint, Stickles, stamps and inks, etc.  I'll be putting my chipboard, stickers, etc in here.


This is where I'll be keeping my papers.  I like vertical storage so I'll be keeping everything in the Cropper Hopper vertical containers in these slots.  I'll also keep the albums I'm working on here, if there's room.  The space to the left is the desk where the kids can do their projects.  There's an opening on this side and another on the other side so they both can be there.


And this is my customized Expedit-style shelf.  I got it made so it'll fit the WRMK d-ring albums so the squares are bigger than the Expedit units.  This is where my albums will go.


Now, it's just a matter of finding a new home for all my goodies!  How exciting!

Monday, February 27, 2012

Thanks Living February 15

The other monthly challenge that I've vowed to keep up with is the Thanks Living challenge.  I've been keeping my journal but I have to admit that I haven't been doing it daily.  I was so good at first but then slacked off.  I was doing it every week or so but now I'm back on the daily track.  Not only is it good for the soul, it's good for the memory and all those daily happenings!

So this layout came from one of my statements on February 15th.  I wanted to get a photo of the kiddos to send to Pascuala.  I have no idea why I thought of it but I asked A if he wanted to get his hair spiked.  He was so pumped about it - I even had to get the full-on shot (as requested by Mr. A).  K also got fancy for the picture and put on her bright pink lipstick - wowzers!  Fun times with my two munchkins are so precious and I love each of them.

Digi supplies used:  "Rawr" kit by Melissa Bennett; "Date Bits" by Misty Cato; "Thanks Living" download by Deena Wuest

Since this month's lesson was on visual hierarchy, I focused on the words to play around with it.  I took Deena Wuest's design for the title and recoloured it to suit the colours in my layout.  Then I played with fonts, colours and sizes in the journalling block.  With the block being that green, it made it a bit tougher to decide on colours but in the end, I'm happy with what I ended up choosing.  I decided to make key words bigger and change their colour to have them stand out and I made sure that my Thanks Living statement really stood out, which is why I "framed" the journalling with them.


I have a couple more statements that I'd like to scrap yet so I may have more of these coming.